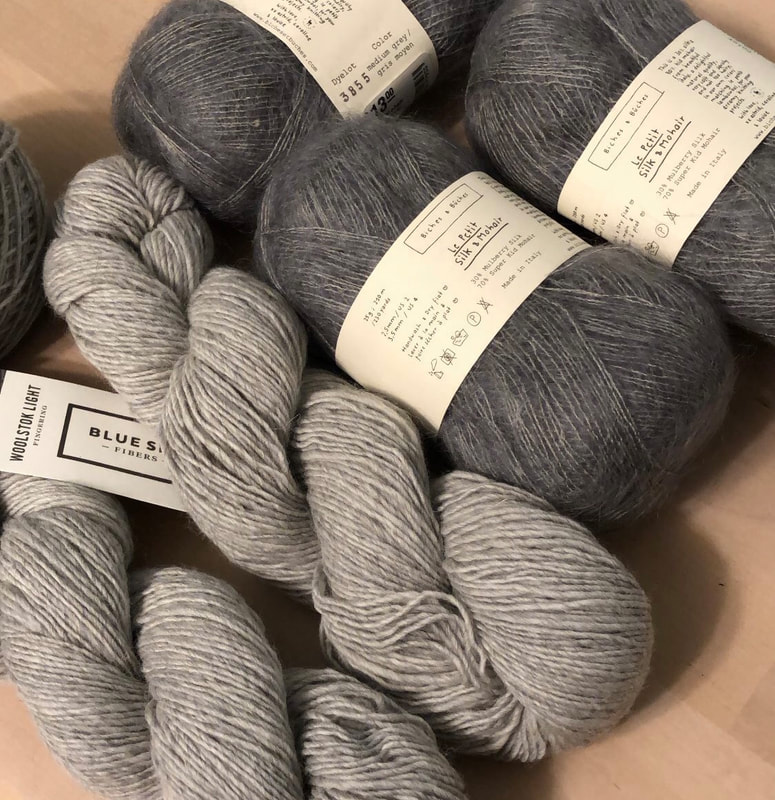
 Sizing & Gauge:I knit a size XS. I made a gauge swatch using the recommended US6 needles, and my gauge was too big, so I sized down to US5 needles and achieved a gauge of 24 sts and 36 rows in a 4x4 inch square, and I used US3 for the ribbing. This didn't change at all after blocking so I'm really glad that despite being off the recommended 22 st x 34 row gauge my finished garment fits perfectly! 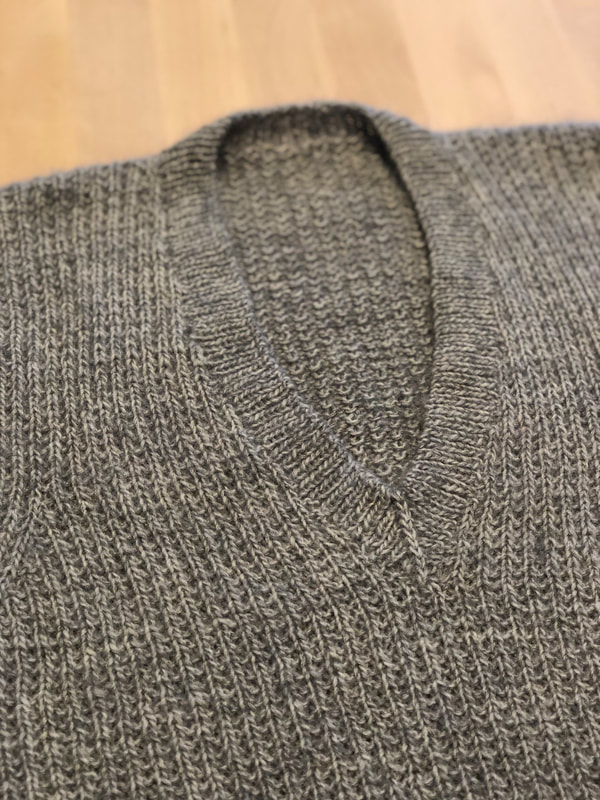 Materials:
This was my first time knitting with yarn held together, and while I was nervous at first it is even easier than knitting with color work or two at a time, since it doesn't really matter if the yarns get twisted (not that they do!). I used my ChiaGoo needle set for this, which was perfect since I had so many extra circular needles to keep the various sections that needed to sit on while I worked other parts. 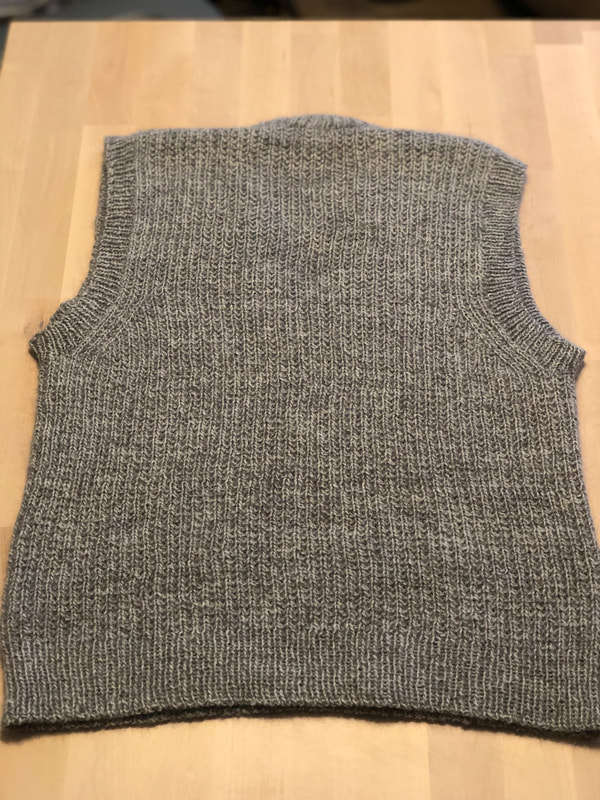 Construction:I am a VERY visual person, and I struggle with knitting patterns in general because they don't show step-by-step images of what each section will look like. That being said, I tried to take pictures along my journey so you can see what the paper pattern becomes at each step. Back: Construction starts with casting on what will become the back neckline/shoulders at the cast-on edge. Then it is worked down into what is essentially a rectangle until you begin the back armhole increases, as can be seen below on the bottom left and right.  The increases were really hard to keep in pattern and I'll show you later how I had to retroactively fix many mistakes at the increase sections on both the front and back. You then break the yarn and leave it on extra circulars while you come around to the front top and work the left and right shoulder. Left and Right Shoulders: The left shoulder is worked first, by picking up stitches on the cast-on edge, and then working increases both at the shoulder and neck. Below is a picture of the finished left shoulder. 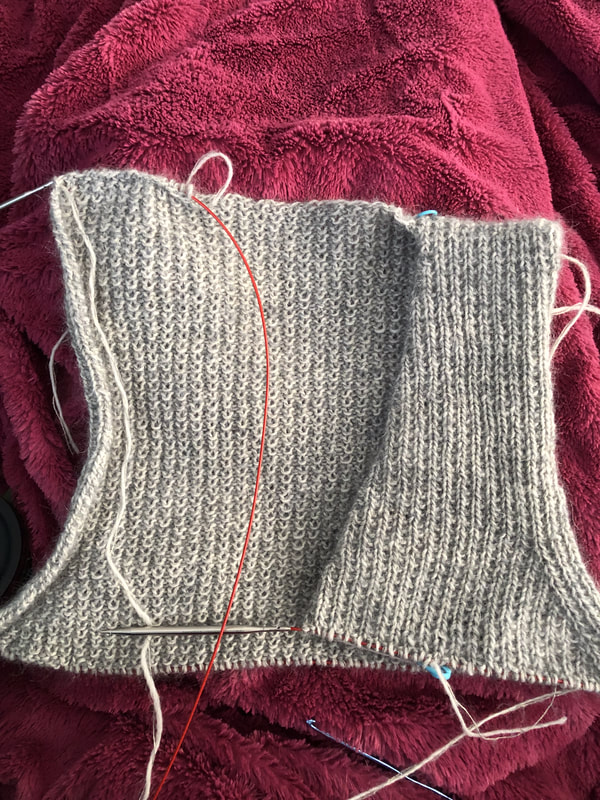 The instructions for the right shoulder drove me nuts! It merely said "mirror the instructions for the left shoulder to complete the right shoulder". Ahhh! I don't know what that means! I had to post on IG and Reddit to get advice, so I'm going to post the sections I worked for the right shoulder just in case it helps anyone else:
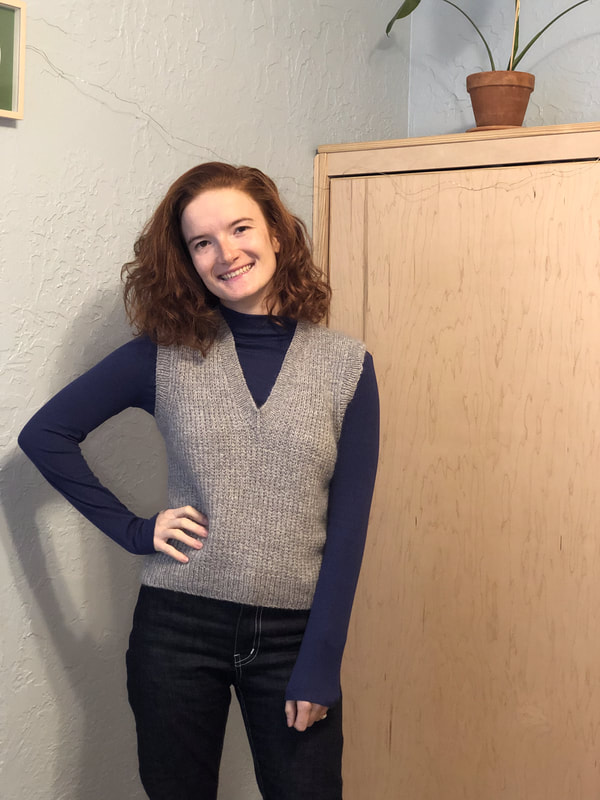
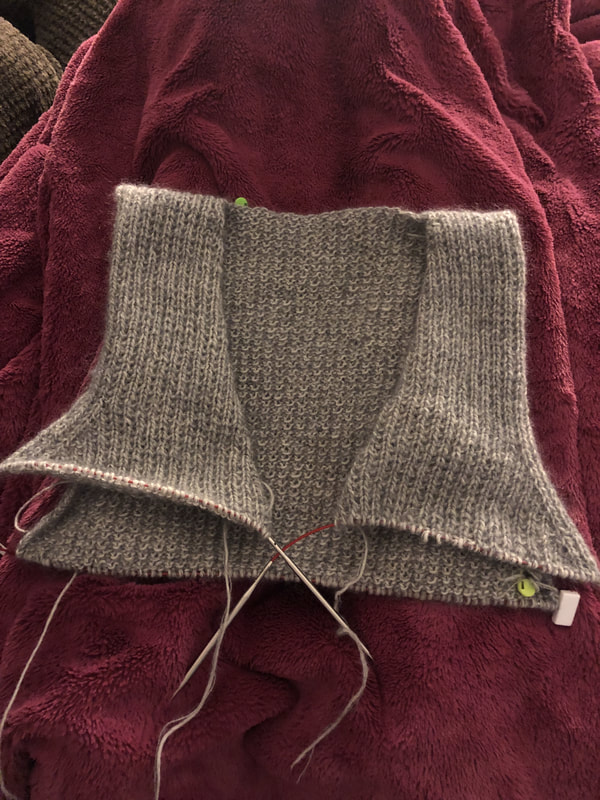 Anyway, I did eventually get it and above is a picture of the two shoulders completed and the body ready to be joined. You can also see why my ChiaGoo interchangeable set is so helpful here, I had three different sections resting on circulars while completing this step. Fixing Mistakes: Around the time I joined the shoulders and back to form the body in the round, I realized I had made several mistakes in keeping the pattern during the V-Neck and shoulder increases. This stems from the casual mention that sometimes after an increase you'll need to purl two back to back. I could never remember when to do that so it was a hot mess. By the time I got to the right shoulder V-Neck increases, I had just written this pattern out row by row with notes about when there would be a double knit or double purl. 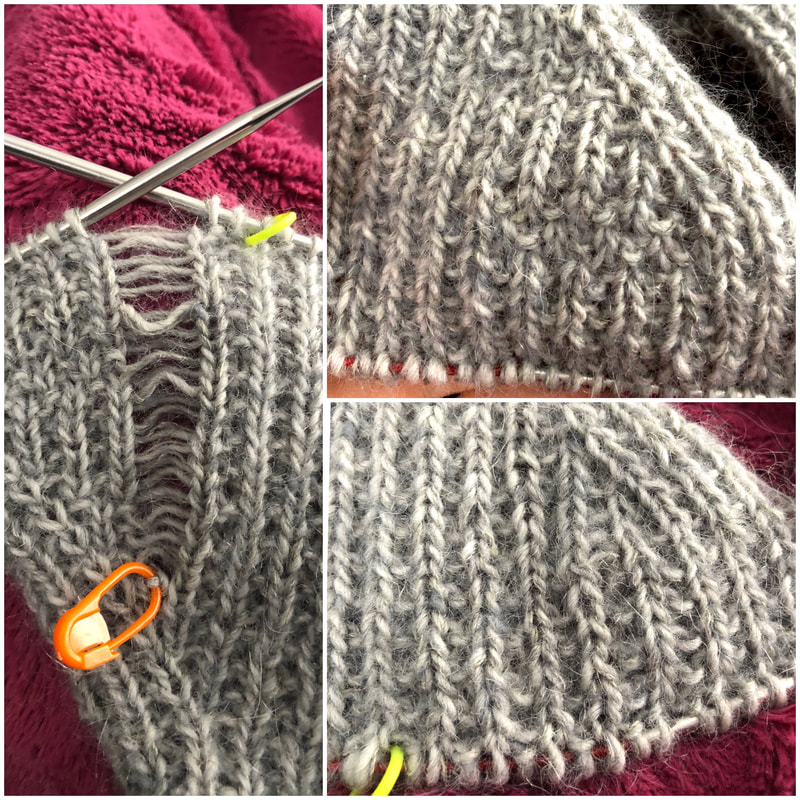 In order to fix the mistakes I made in pattern, I used the "laddering" method, where you put a marker in the last correct stitch in a column, then drop the stitch and unravel down to the point you need to fix. Then using a crochet hook, you pick up the stitches in pattern. For the knit columns this was a breeze, but fixing broken rib was a pain in the butt using this method. In the picture above, the top right is what the increases looked like out of pattern, the bottom right is afterwards, and the left is a picture of what the laddering method looks like. While fixing mistakes this way did impact my tension, after blocking you can't tell at all where I had to make these adjustments. I am also very proud of myself because I just knew what I needed to do the second I spotted the problem, and it felt like I have finally reached a place in my knitting where I understand the structure of a knit so well that fixing mistakes feels like a breeze. Body: 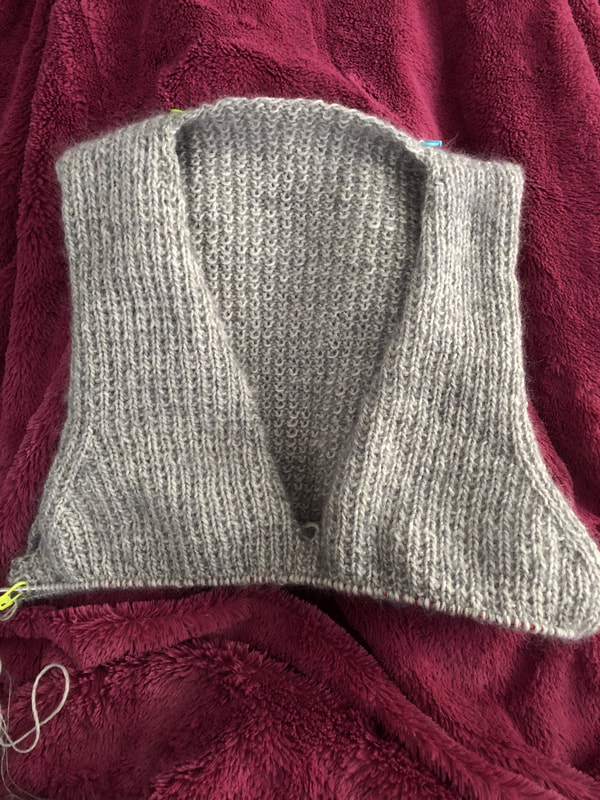 Joining the body was easy, then I basically worked until I got bored and did an armhole ribbing. Worked the body some more, did the other armhole ribbing. Then I made sure to do the V-Neck ribbing about 3/4 the way through the body so I could try it on and get a good idea of the length I wanted. Armhole & Neck Ribbing: 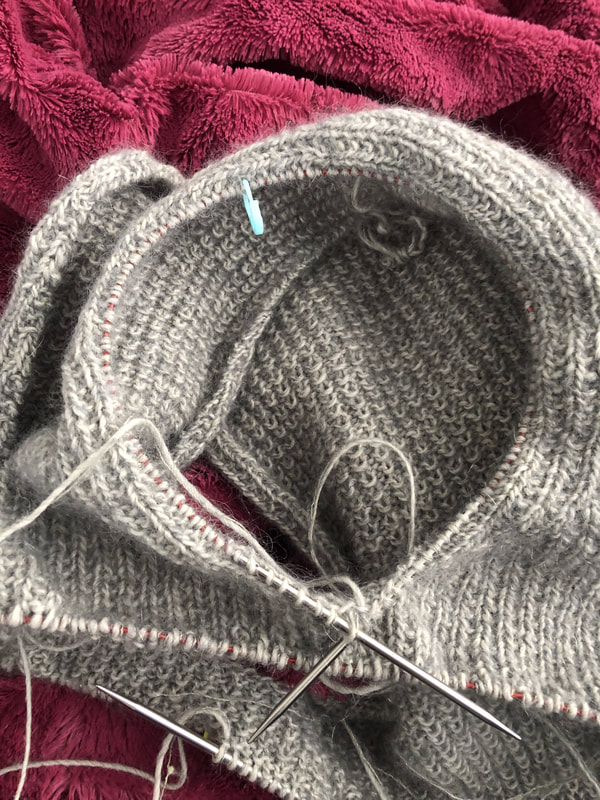 Picking up stitches for the armhole & neck took me forever, mostly because I couldn't figure out how to pace my stitch pickup to get the exact amount of stitches needed without gaps. Once I did the ribbing, though, I loved seeing the garment really come together and look so much cleaner! 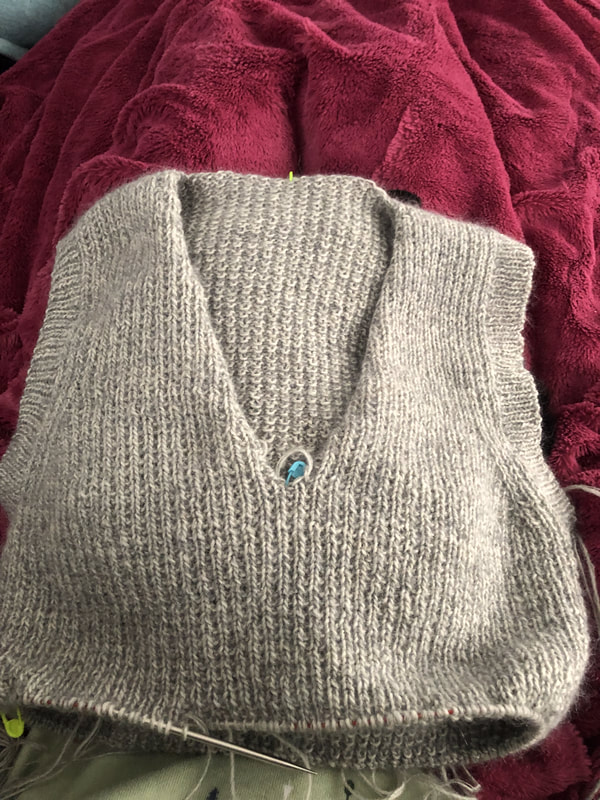 Above is the V-Neck before adding the ribbing, below is what it looked like during the ribbing while still on the circular.  Due to using a shorter circular to complete the v-neck ribbing, the shape was more round than I anticipated until after blocking, when it finally settled into more of a "v".  I used the Italian bind off method for everything, and holy crap did it take forever but it did end up producing the stretchiest ribbed bind-off I've ever used. I found this tutorial from Sunday Knits to be so valuable in learning the Italian bind-off. I highly recommend checking it out! Final Thoughts: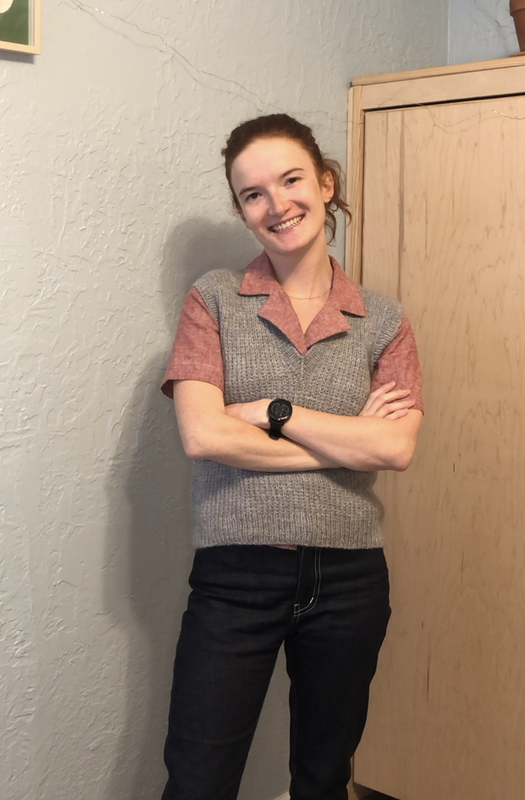 I initially chose the v-neck version to try and wear it over button downs, like my Gilbert Top it is pictured with above. I don't love it, but also I never knew - I've never owned a sweater vest!
Overall though this pattern is fantastic and came together relatively quickly! I started in on December 7, 2021 and finished it on January 1, 2022. Broken rib is just detailed enough to keep my interest during longer stretches like the body, and the decorative increases are so fun to work and a challenge to do well! I'm already planning to make another one of these right way, so that's a great sign! I rarely finish a knit project and want to turn right back around and start again!
0 Comments
Your comment will be posted after it is approved.
Leave a Reply. |
About FrancescaI got my first sewing machine middle school, circa 2005 (although I don't remember learning much in the way of sewing). After a long hiatus, I was reunited with my machine in 2019. I re-entered the hobby through gear-making, and have been crafting a handmade wardrobe since late 2020. I have a real affinity for comfy clothes (secret pajamas) and all the colors! Archives
August 2023
Categories |
 RSS Feed
