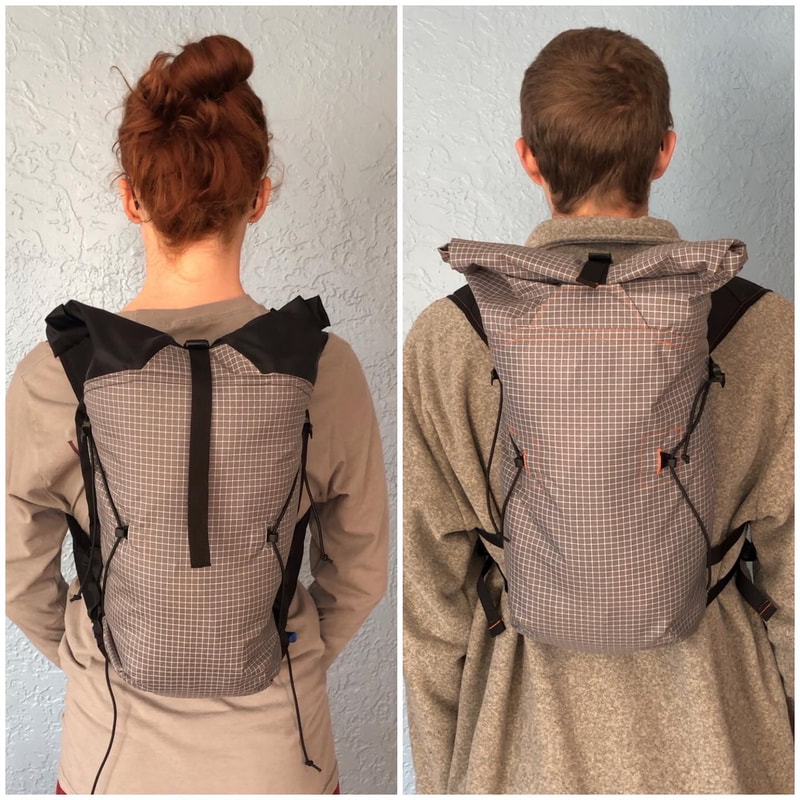
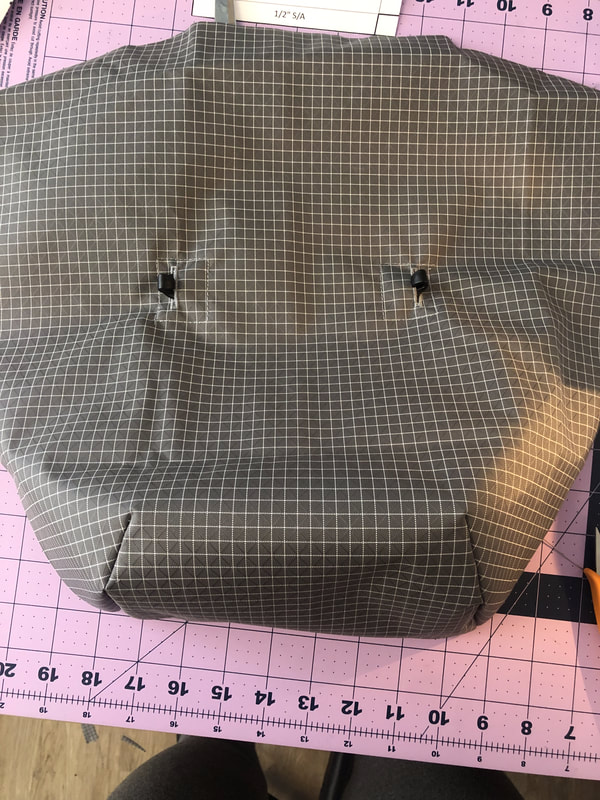
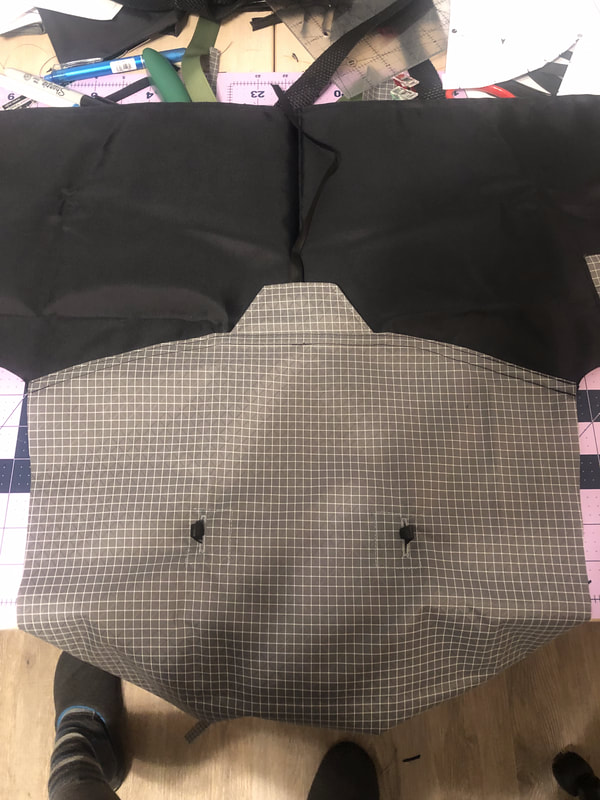
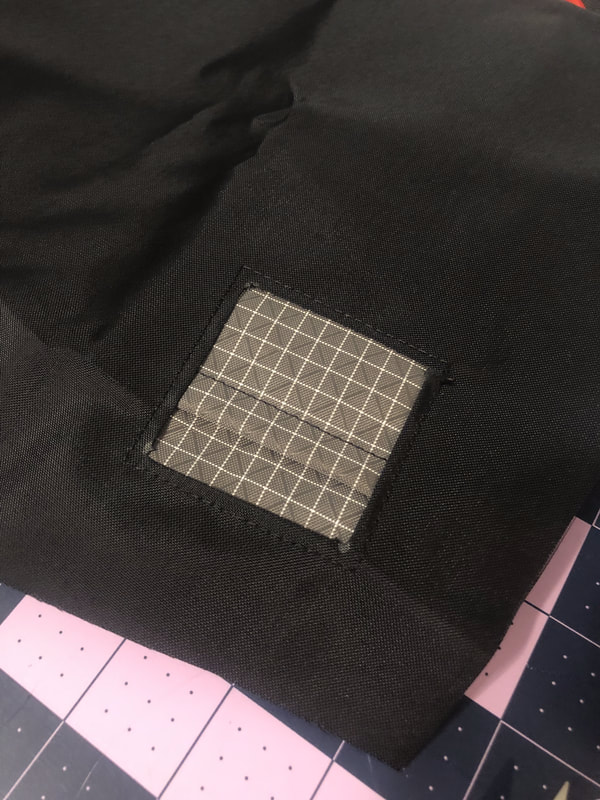
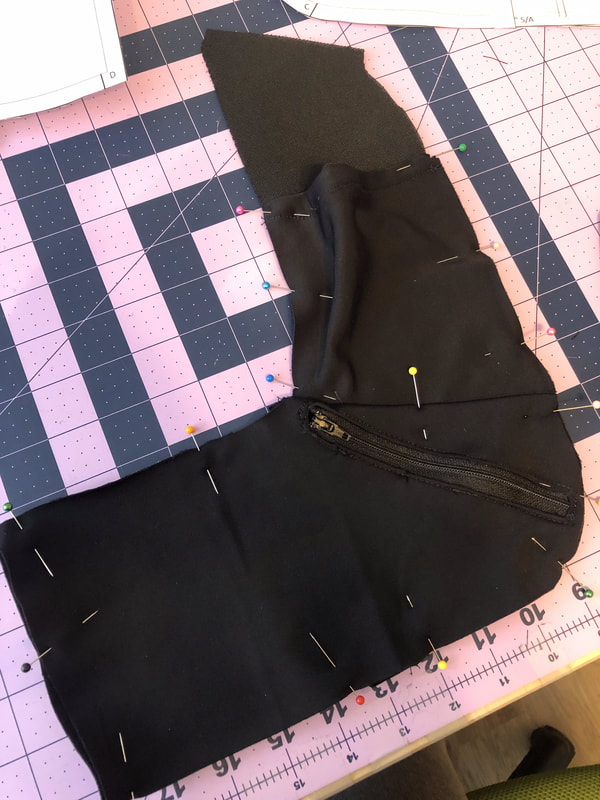
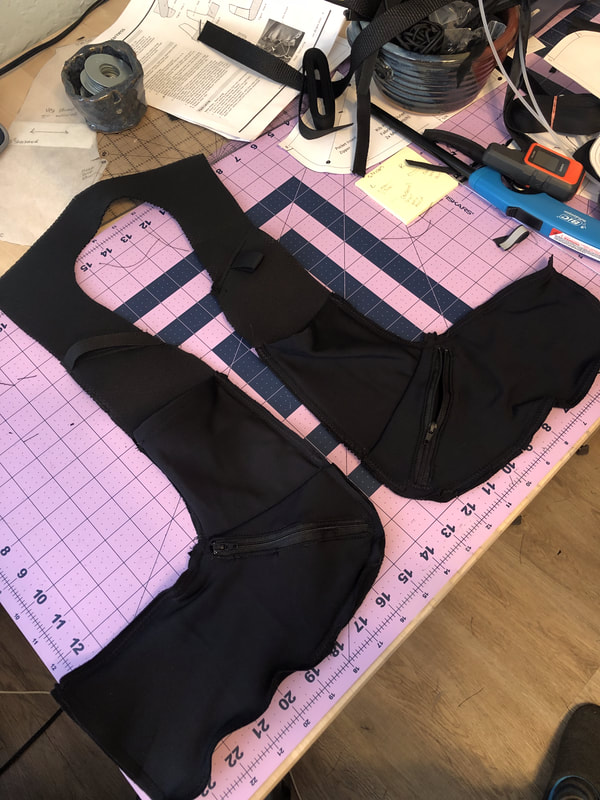
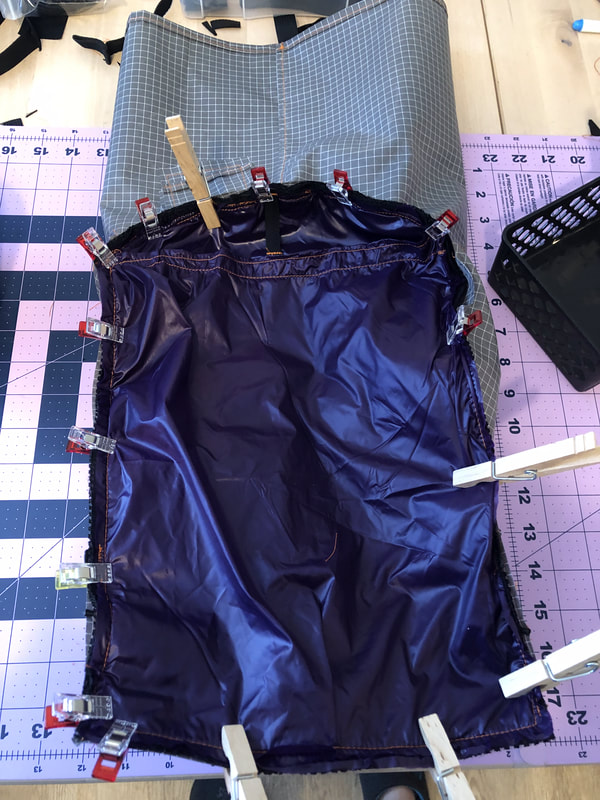
 I've been looking for a ~10L pack design for awhile, both for use as a day pack, but also as a stash buster for all the bits and pieces I have laying around. This pattern served both purposes perfectly! View & Sizing: The body of this pack is pretty straight forward and doesn't require a lot of adjustments. The straps, however, open a world of possibility. The two primary choices are between a wrap around harness and standard vertical straps. The standard straps feature a zipper pocket on the left strap and a long bottle pocket on the right. The wrap around features two rib zipper pockets and two bottle pockets, and attach to the pack using a lacing system. View of the two strap options side by side. Mine is the wrap around harness & Kevin's is the standard. 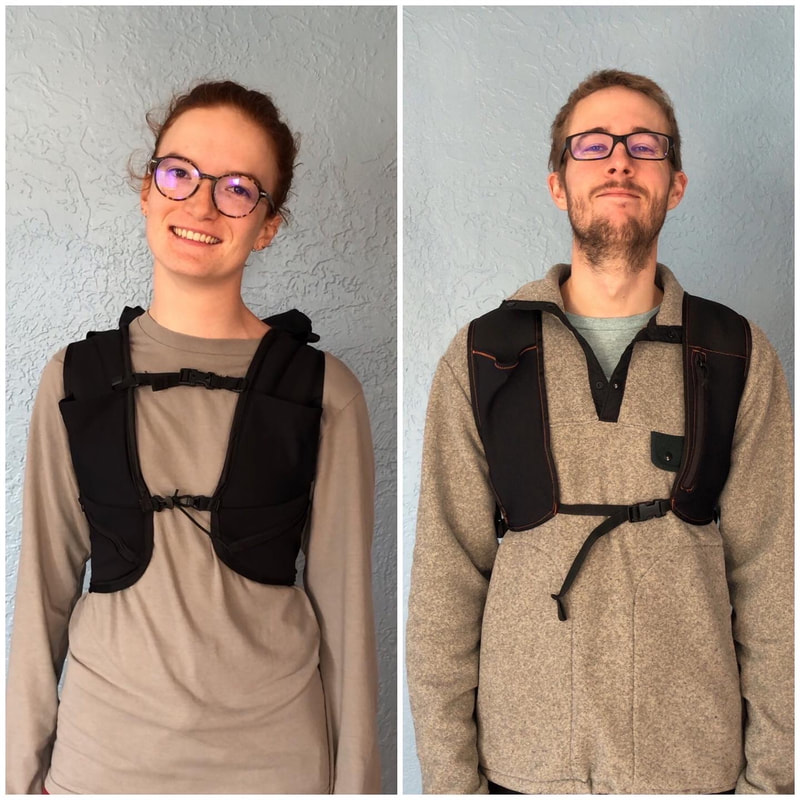  As you can see, mine uses a lacing system while Kevin's has two adjustable straps using tension locks. I knew from the get go I would need to shorten the vest straps, but I couldn't figure out how much just from measuring the pattern pieces. I knew I would likely make Kevin one too, so I decided to cut out the yoke and two vest straps in the 3D spacer mesh so I could get a feel for how much to shorten the straps so they would end at my last rib. Ultimately I needed to shorten the vest strap 3 inches (I'm 5'3"). 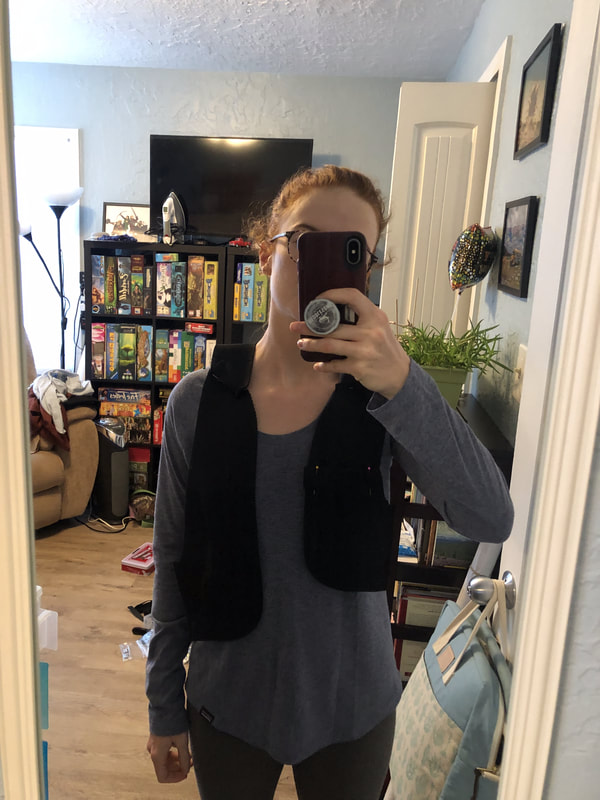 The left side is the vest strap as is, the right was after taking 3 inches out. 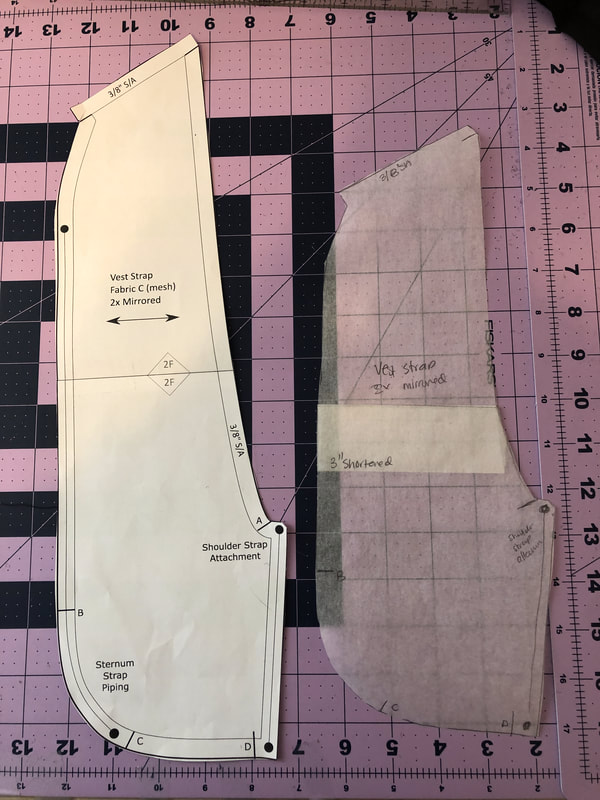 The two pattern pieces side by side, next time I would also make the strap more narrow to fit my small torso. In addition to shortening the vest strap, I also shortened the rib pocket pieces 2 inches. At first I only shortened them an inch, but as I did the lacing I ended up shortening them another inch. I'm thinking I needed to take more in still, because on the tightest setting the pack is JUST right (and I would like to be able to tighten more when conditions require absolute minimal bounce). Kevin is 6'4" and his didn't require any modifications to the pattern. 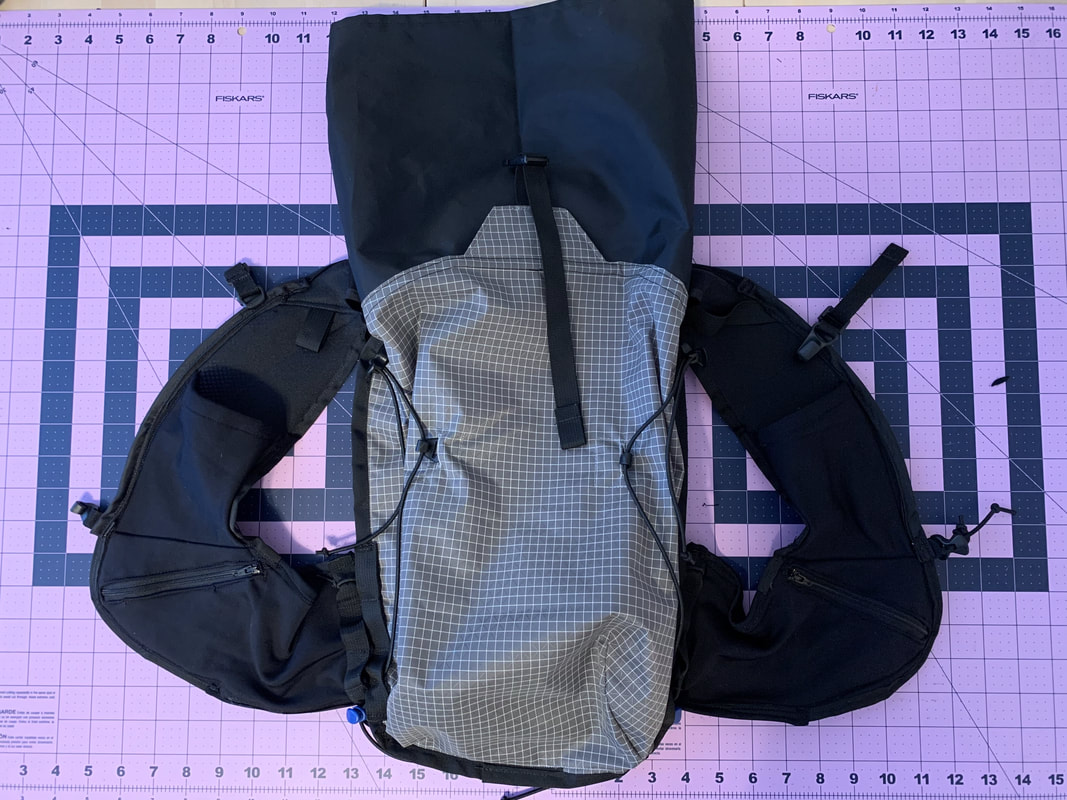 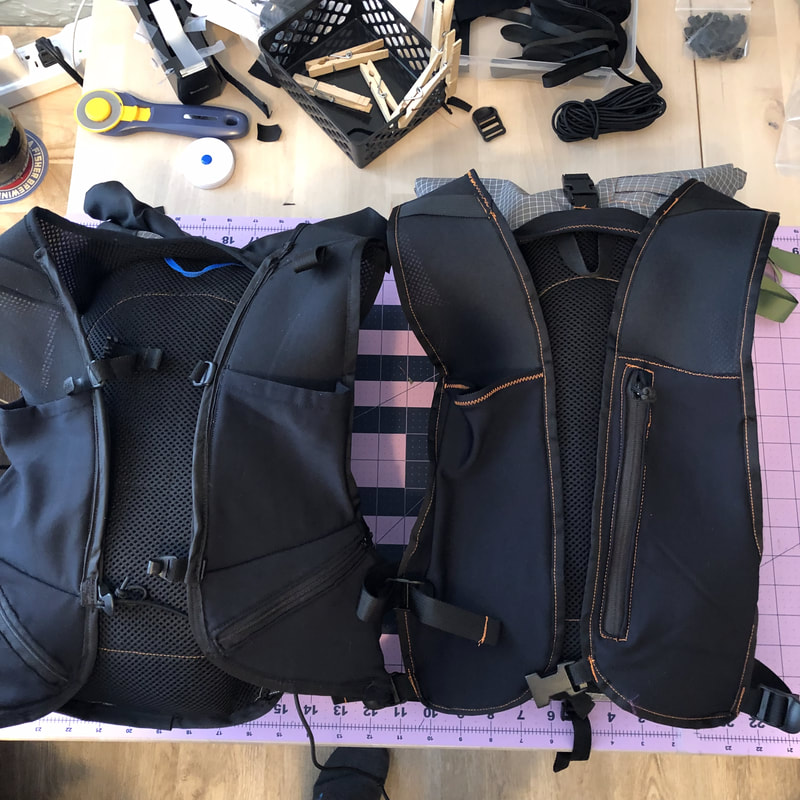 Materials:I think my biggest accomplishment with these two packs is that they were made using 100% scraps from my stash! Most of the material was leftover from the TH50 pack by Stitchback DIY Trial Gear that I made last summer. 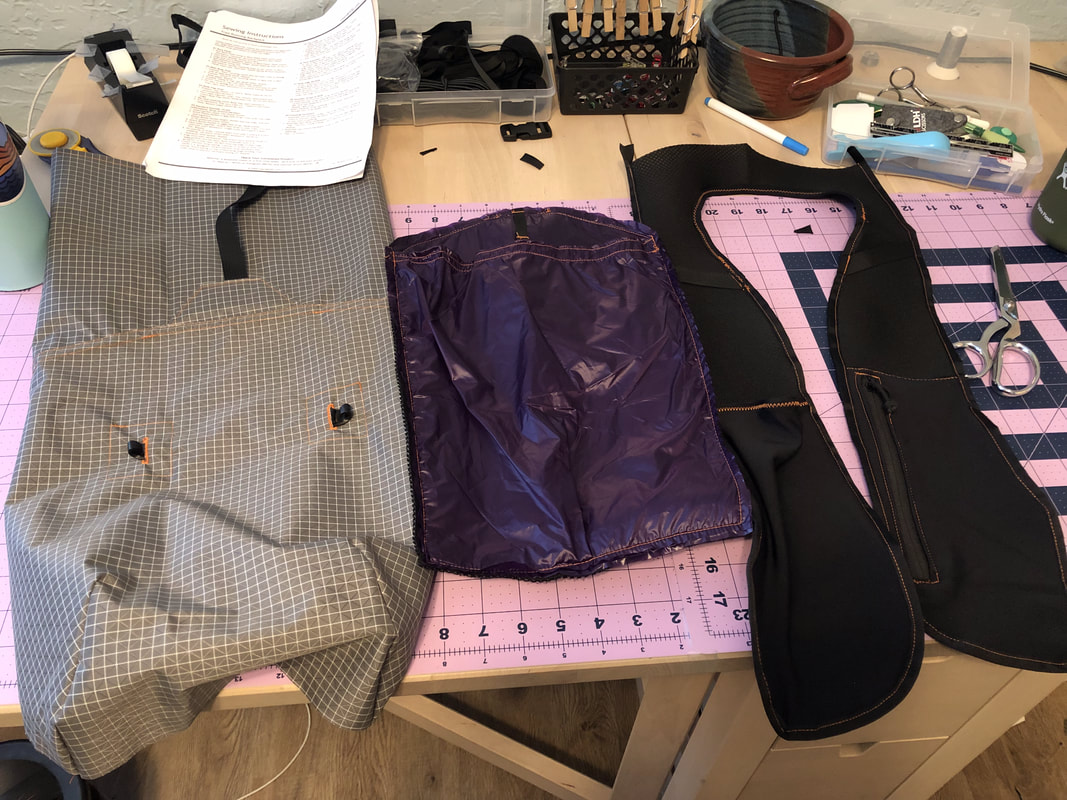 All the pieces laid out just before final assembly. I'll do my best to break down the materials here:
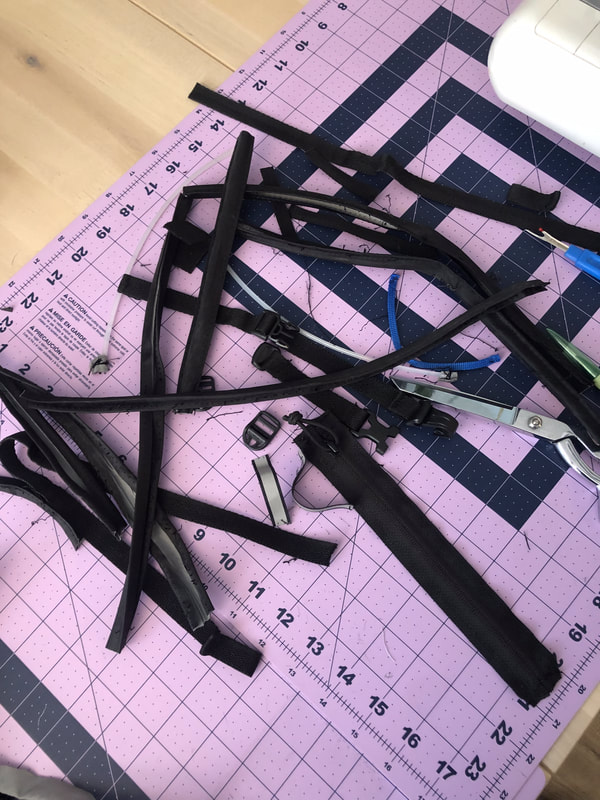
 Additionally I got a bunch of bits and pieces from my coworker's old camelback trail runner that her dog recently destroyed.
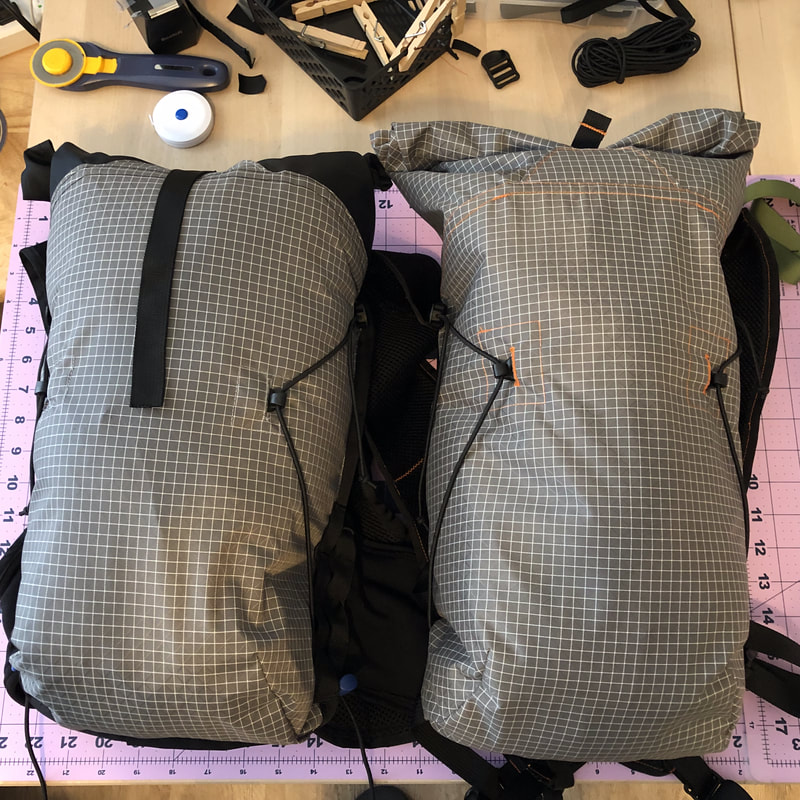
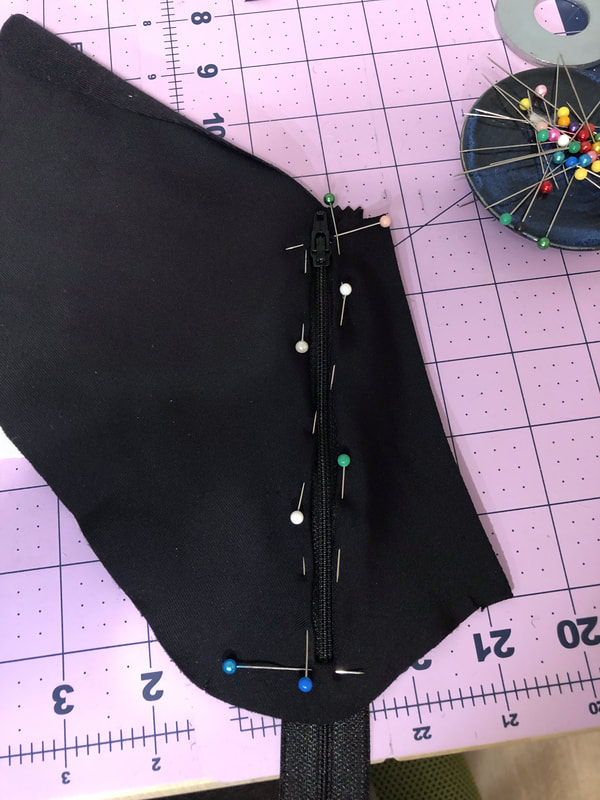
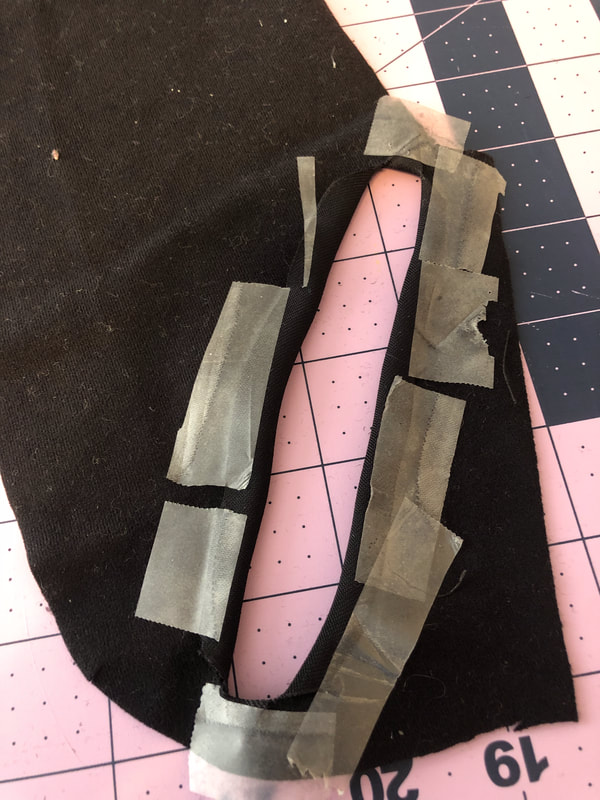
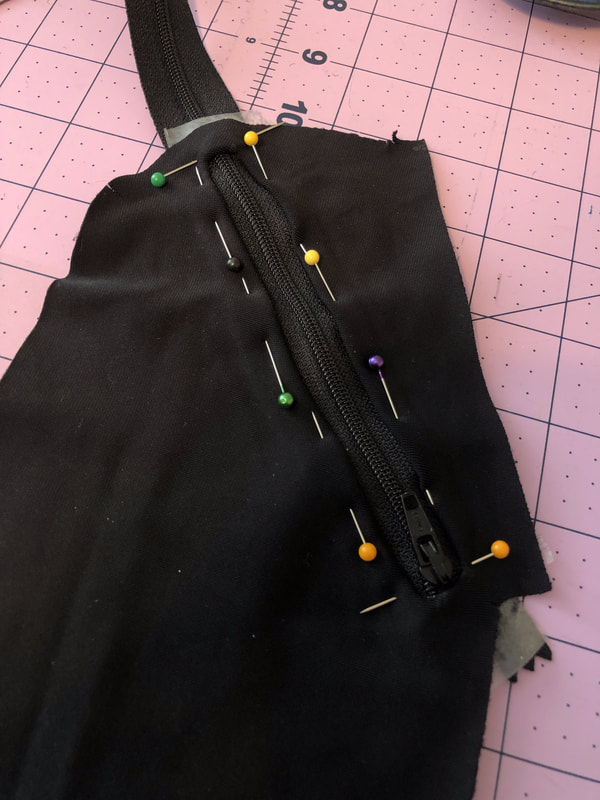
Construction:I documented making the first pack and saved it on my IG stories. The first pack came together in about 8 hours over 2 days. The second pack came together in 5 hours, the body took about 3 hours at night and then final assembly + final touches took about 2 hours the next morning. I really loved how easily this pattern sews up. The inline D rings on the main body are super nifty, the hydration port is super easy. I would, however, like to STRONGLY DISAGREE with Tim, who said flat-felling the collar/body seam was the hardest part of the make. Hands down sewing a zipper into a non-reinforced knit fabric was the hardest and I hope to never do that again.It was impossible to prevent the fabric from stretching so the zipper just doesn't look great if you look super closely at the stitching. While it's super functional and arguably just had to be done that way, it sucks and I hated it. That's a huge part of why I just made Kevin's with the standard straps so I only had to install one zipper for him. I'm not proud of it, but scotch tape worked great as a substitute for basting tape. 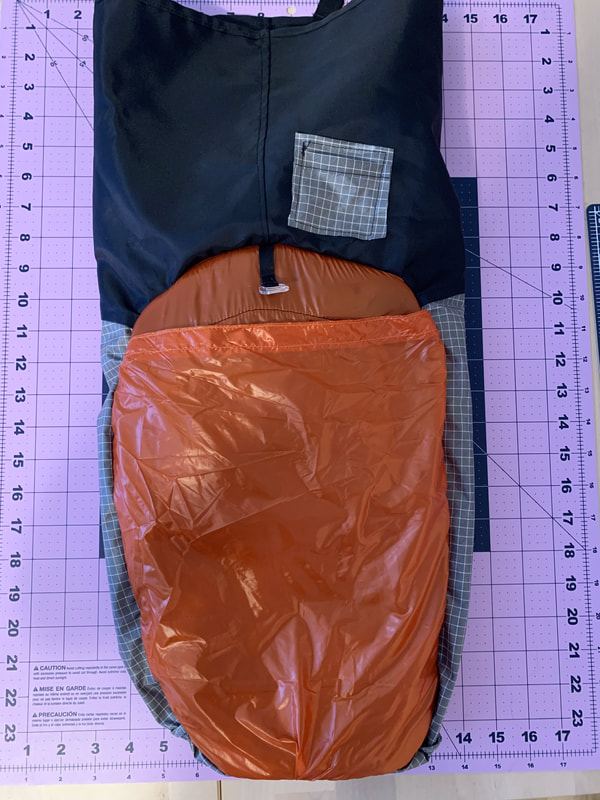 I didn't realize when I started this that the pack is meant to be externally bound. I find this finicky and less visually appealing, but since my first pack used the warp around harness I couldn't figure out how to lace it without external binding. I fully recognize that the seams are strong in external binding, I just don't like it. For Kevin's I did internal binding (and quite frankly his pack has ugly guts, because I had to bind a 1/2" SA with 3/4" webbing since that's all I had). 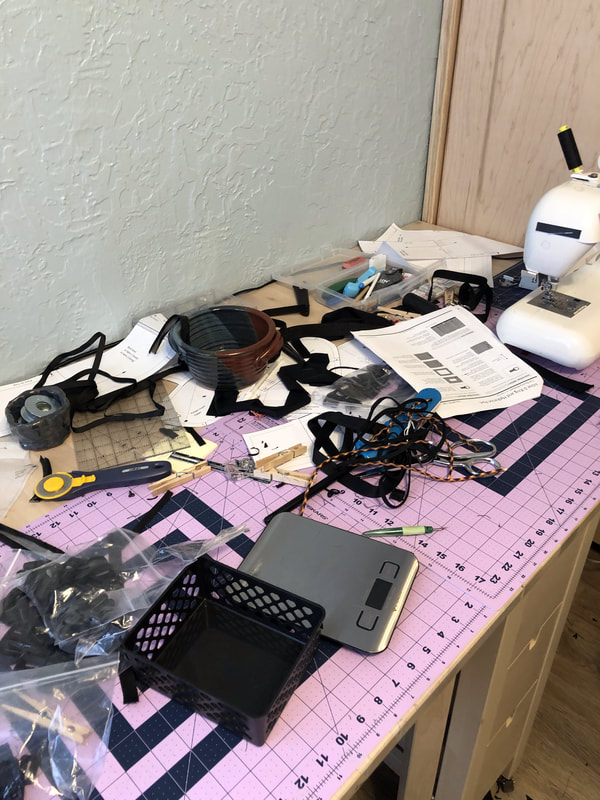 Evidence of the absolute chaos of trying to find all the hardware for this pack. Final Thoughts: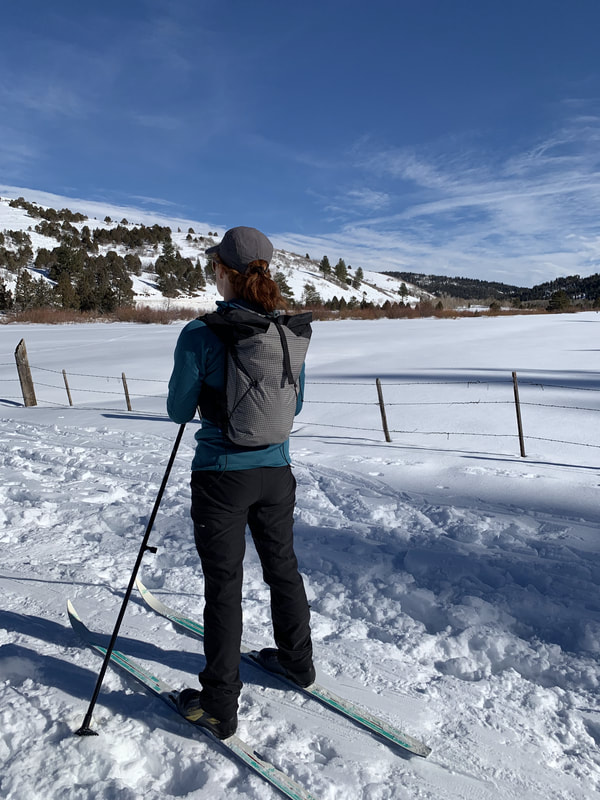 This pattern is super straightforward, and Tim includes step by step videos detailing each step of the make. I really like the 10L size, it fits my 2L hydration bladder perfectly with room for layers, snacks and my 10 essentials. The vest pockets are roomy. While I intend to use it for trail running in the summer/fall - for now it's my XC skiing pack and holds everything I need perfectly. 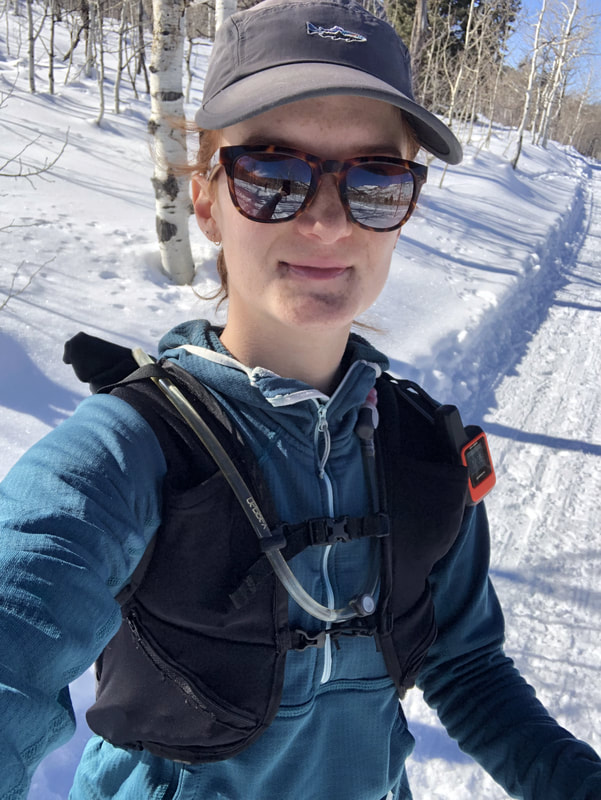 My only critiques are that for a $30 pattern I do wish it came with a petite-size vest strap option. While I recognize the instructions call for prototyping, it would be easier to start with something more woman/petite-person friendly. When I made the TH50 pack it came with alternative hip belt and shoulder strap options for men/women, and additionally had S/M/L options. As I was making this pack and documenting it on my IG stories, several women makers reached out to share the various mods they had to make so the vest straps fit them appropriately. I also had a love/hate relationship with the youtube videos. Mostly because there were 12 videos total, and youtube has become overrun with ads. It also served as a roadblock at first where instead of just skimming the next section of instructions (as an experienced maker) I instead had to pause and find the next video. This is probably for the best because I didn't make many mistakes, and if I'd just plowed through I know I'd have spent a lot of time seam ripping. I'll also admit that the videos helped a lot with visualization and seared the steps into memory so my second make came together in a flash. If you're looking for a trail running pack, I definitely recommend this. I haven't made any other gear from LearnMYOG but I'm definitely down to make more going forward! I especially appreciate how accessible Tim is both on Reddit & IG to ask questions and throw ideas around with. 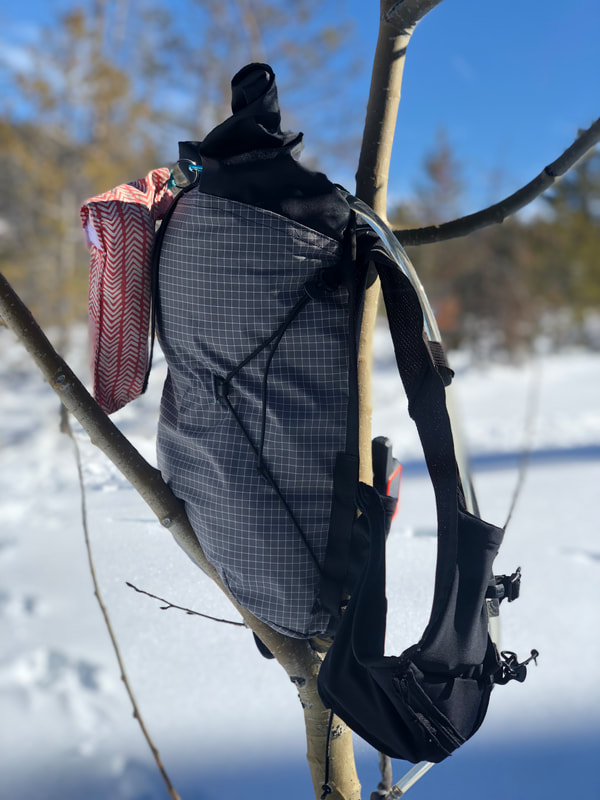
0 Comments
Your comment will be posted after it is approved.
Leave a Reply. |
About FrancescaI got my first sewing machine middle school, circa 2005 (although I don't remember learning much in the way of sewing). After a long hiatus, I was reunited with my machine in 2019. I re-entered the hobby through gear-making, and have been crafting a handmade wardrobe since late 2020. I have a real affinity for comfy clothes (secret pajamas) and all the colors! Archives
August 2023
Categories |

 RSS Feed
