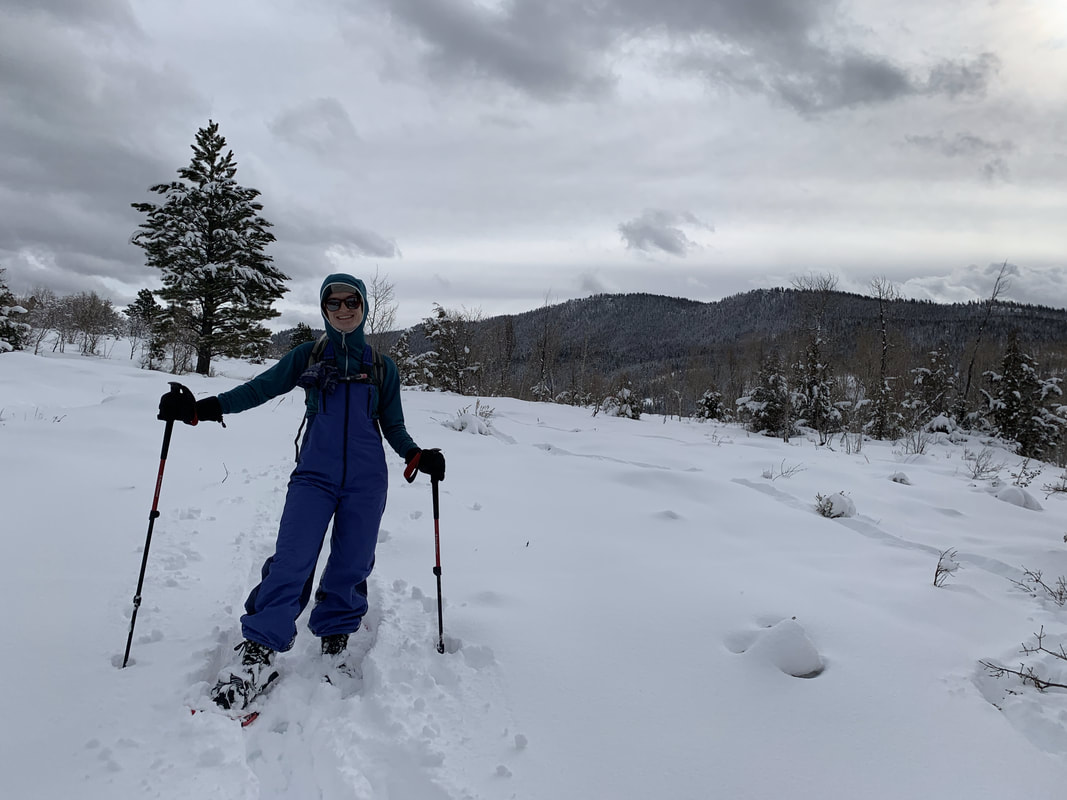
 Ever since moving to Utah I knew I needed some sort of snow pants, but I never ended up buying a pair (soooo pricey, how often will I wear them, very few made for short people, etc.). Eventually I decided to make my own. After sitting on the pattern and materials for over a year, I finally made the perfect fitting pair! View & Sizing:
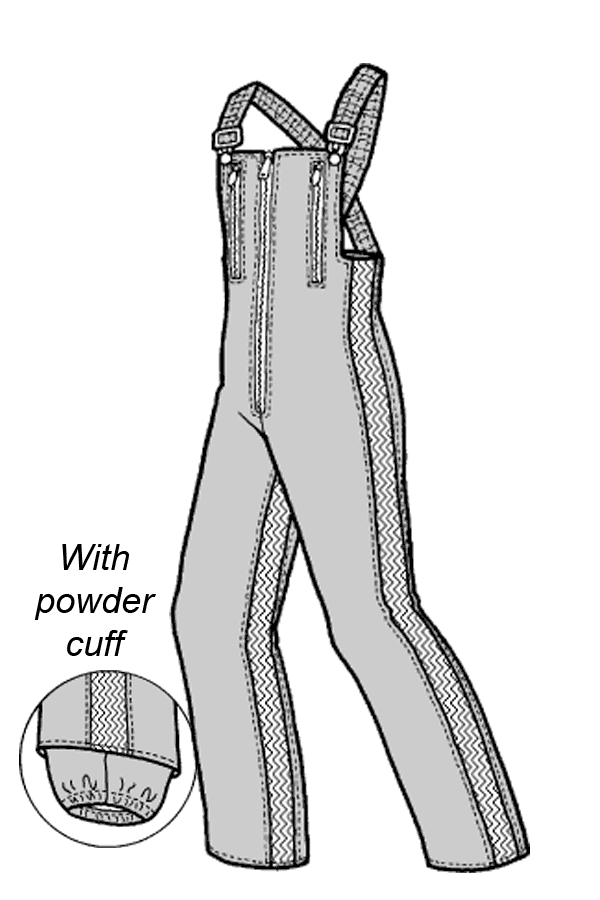
Now that I've made the pattern, extending the pieces and creating a fully waterproof snow bib is 100% possible. I would recommend adding 1" to the inseam (tape the insert piece to the side overlapping at the 5/8" seam allowance) and at minimum 2" at the sides. After all, snow bibs are designed to be baggy so you can adequately move around. 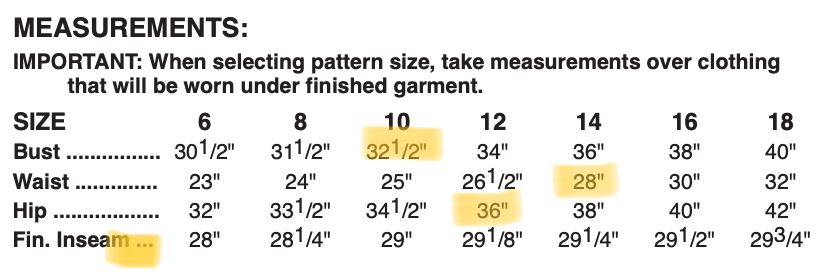 This is about the 5th Green Pepper Pattern I've made, and I am therefore VERY aware that they are comically oversized. My measurements would've landed me at roughly a size 12, but I measured the pattern pieces extensively and ultimately decided to make a size 8. I shortened the inseam 2". Because of the stretchy side panels, the finished garment fits me snugly around the chest/waist (with a base layer and mid-layer underneath), and baggy enough in the hips and legs to allow ample movement. 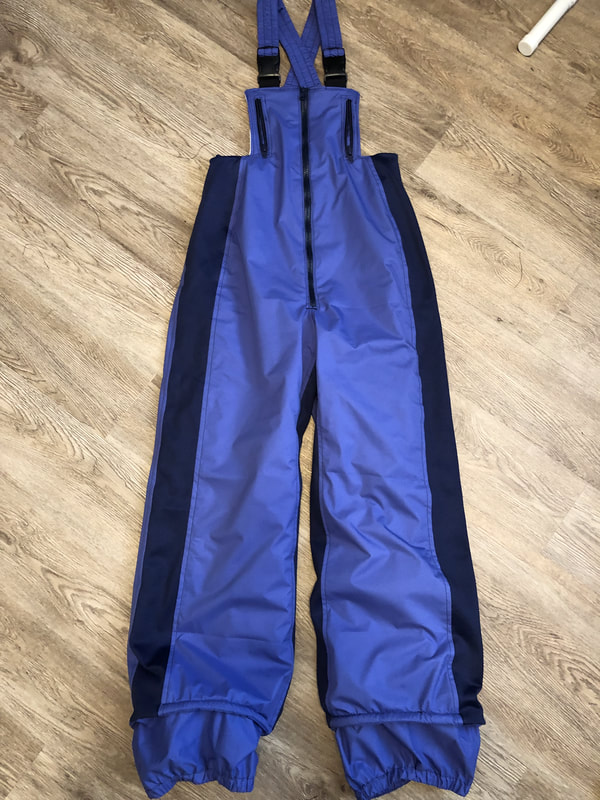 Materials:I purchased all of the materials online from the Rain Shed Inc. I have ordered tons of materials from them and am always very satisfied with the quality of the items and speed of shipping. 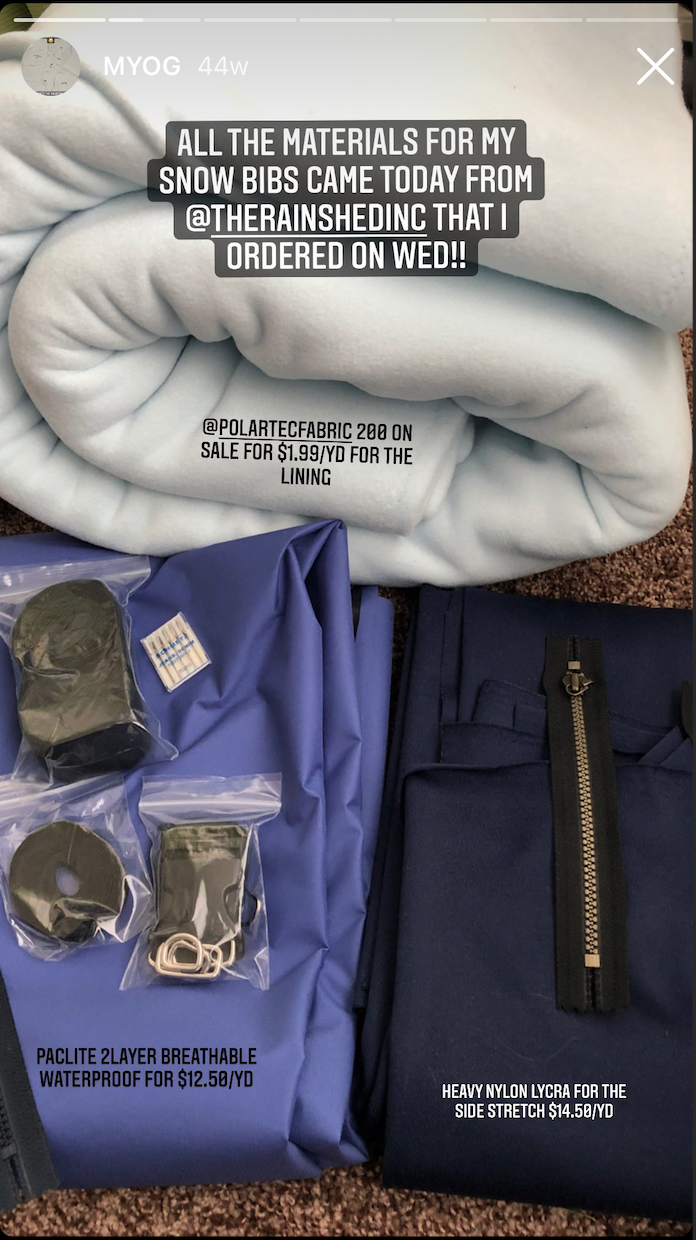 The waterproof outer fabric is Paclite 2-Layer Breathable Waterproof fabric in the color Glacier. The stretch insert is Heavy Nylon Lycra. The inside lining is PolarTech P200 recycled fleece. I really enjoyed working with the Paclite. I've used quite a few different waterproof fabrics and this was the least slippery to sew with. It is definitely heavier weight than 1.4oz 10D from RBTR, so not ideal for ultralight projects, but perfect for this. I ordered way too much of the P200 (it was on crazy sale) so I'll get back to some of my fleece makes eventually to work through that stash. The Nylon Lycra is super sturdy, although I noticed the greatest stretch was on the crosswise grain so that's how I cut it. Despite being the weakest point on the snow bibs for waterproofing, it's held up great after several hours in the snow.  I followed just about all the material recommendations for this pattern except I opted to use plastic buckles instead of standard metal overall buckles, which the pattern called for. Because of this, I needed to insert the female end of the buckle, with 1.25" webbing at the stage where you sew the insulation to the outer lining. I find the plastic buckles are far more convenient for snow activities (where I often have gloves on). I'm still waiting on the triglide I ordered, so for now the straps have a safety pin keeping them in place. 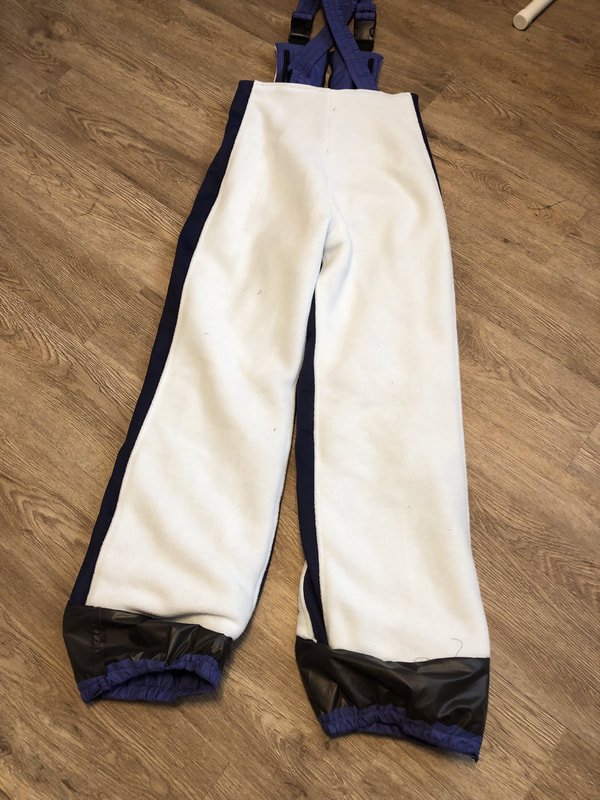 Construction:This project contains so much topstitching, every seam felt like it was repeated five times! This is to reinforce the stretch inserts, and further reduces the potential waterproofing of the snow bibs. The instructions are incredibly clear, and in all the project took 8-10 hours in one day to complete. (I don't recommend doing this in one day, I was exhausted by the end and made some sloppy mistakes on the powder cuffs that ended up needing to be redone after a few wears). 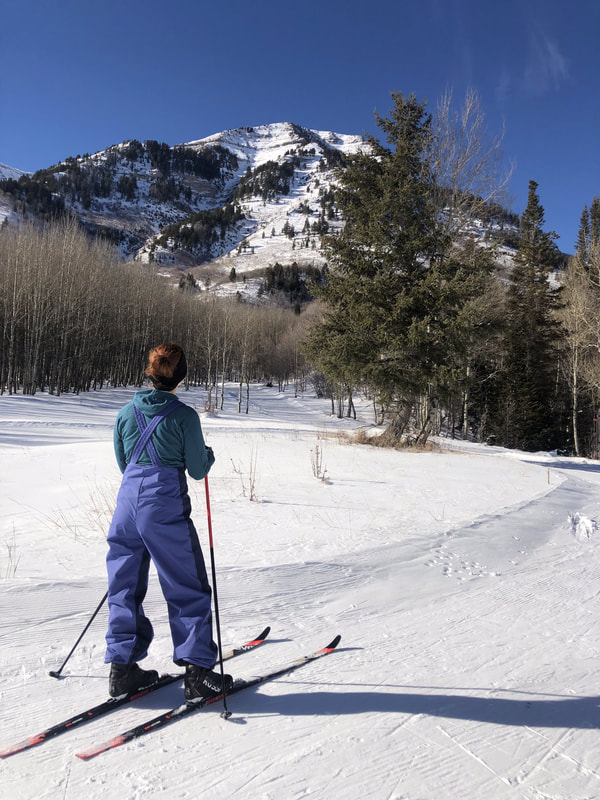 My least favorite part of this pattern is how small the chest pockets end up being after all is said and done. At the beginning it felt like the pockets were going to be super spacious, but with each step they got smaller and smaller until I can barely squeeze my iPhone X into one of them. I highly recommend extending the front section 1", and extending the zipper box to a full 7" so you can get more use out of the front zippers (which could easily hold your phone and more if the zipper box wasn't so small and if the front center zipper didn't require you to lose a good inch or two on the zipper pouch).  I also royally screwed up the powder cuffs my first go around. They were the last thing I sewed, and I was absolutely exhausted and antsy by then. I recommend waiting to cut out the powder cuff pieces until the very end. My final leg circumference was 24", and the powder cuff piece is only 23" and that includes the seam allowance. I went back and cut new powder cuffs at 26 1/4" (24" plus the 10/8" for two seam allowances). I also lengthened the piece so I can insert the cuffs in my boots without that causing the bottom to bunch at the top of my boots. These aren't constructed the normal ways now pants have powder cuffs, so that makes them a little finicky. 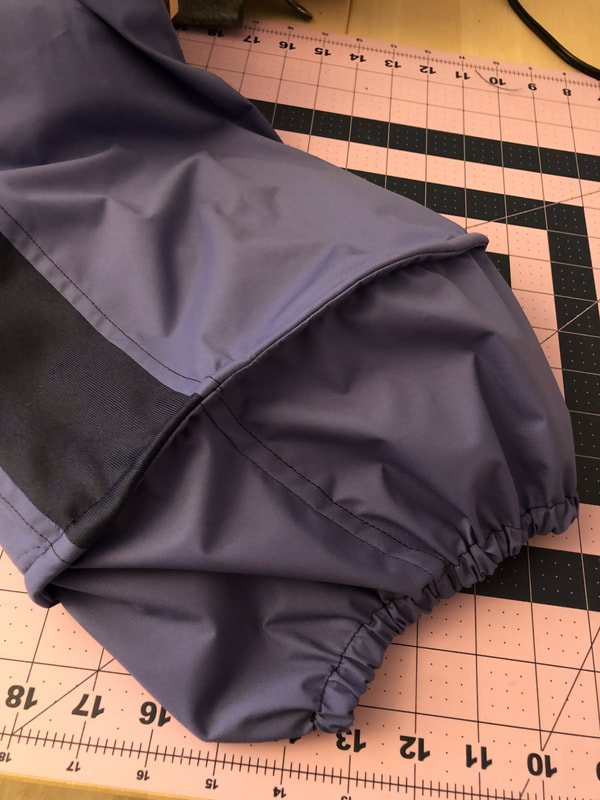 This is the finished powder cuff on the second go. I also created a tube to insert the elastic in, instead of sewing the elastic to the powder cuff like the instructions say to. I did that the first time and it super stretched out the elastic. I also cut my elastic at half the length of the powder cuff plus 1", instead of 2/3 the length of the cuff. This way there is less bulk in my boot. 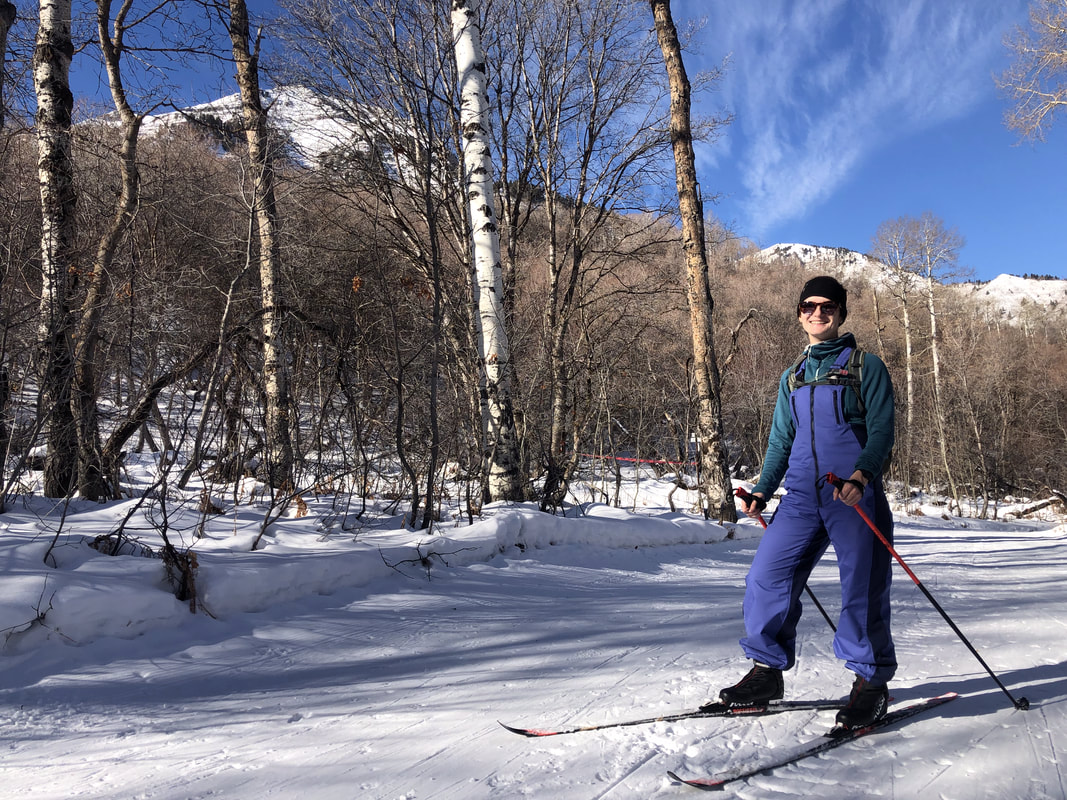 Final Thoughts:This is a great pattern for snow bibs, and can easily be adjusted to be 100% waterproof. For snowshoeing and cross-country skiing (my primary uses) the stretch panels are perfect and I appreciate that the bibs aren't baggy. There's some room for improvement in the chest pockets and powder cuffs. If I find myself needing a waterproof fabric again for a non-UL project, I'll be using the Paclite. It was so lovely to sew with. 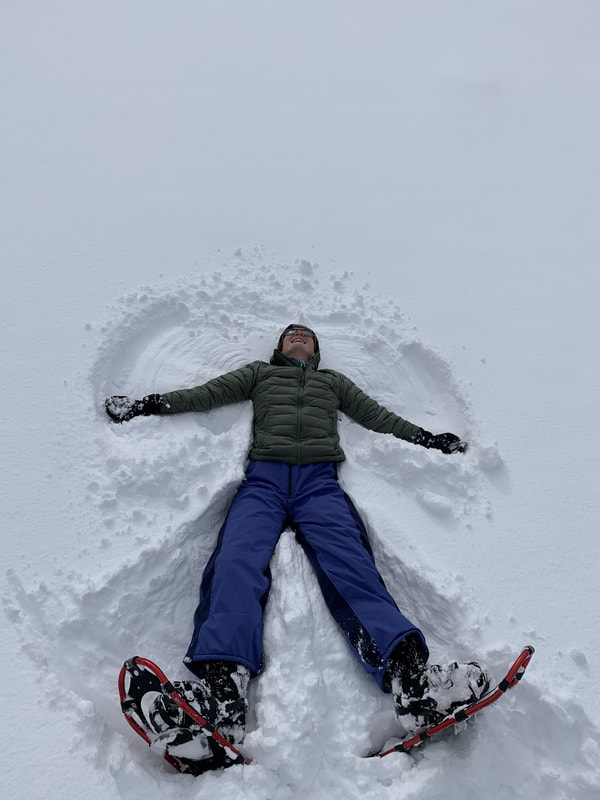
0 Comments
Your comment will be posted after it is approved.
Leave a Reply. |
About FrancescaI got my first sewing machine middle school, circa 2005 (although I don't remember learning much in the way of sewing). After a long hiatus, I was reunited with my machine in 2019. I re-entered the hobby through gear-making, and have been crafting a handmade wardrobe since late 2020. I have a real affinity for comfy clothes (secret pajamas) and all the colors! Archives
August 2023
Categories |
 RSS Feed
